
Burlap Sweetheart Pillow
|

|
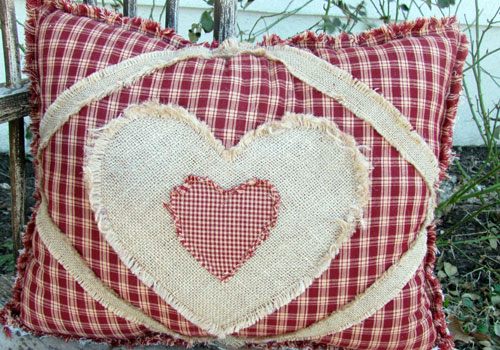
This is a super fast and easy quilted pillow project! This burlap and homespun Sweetheart Pillow can add a little primitive handmade style to your Valentine's Day decorating. The finished size is approximately 16" x 20".
This project should take you 2-3 hours to complete at the most. The instructions below call for doing the back side blank but you can easily decorate the back panel as well using the same embellishment instructions. You can repeat this design on the back or do something else unique and creative.
Homespun fabric is highly recommended for this shabby ragged project. Regular cottons just do not fray as well and the end result will not look like the pictures here. Our shopping site: www.JubileeFabric.com offers over 150 homespun fabric options.
Hope you enjoy this quick little quilting project. If you make one of these, please send us a pic! We love seeing what our customers are stitching up!
Materials Needed:
- Fabric #1 - 1 yard homespun fabric (Any of the red homespun fabrics here would look great!)
- Fabric #2 - scrap piece (or fat quarter) of contrasting or complimenting homespun fabric for the smaller heart applique
- One roll of 1" x 72" frayed edge burlap or primitive style ribbon
- One scrap piece of burlap, approximately 12" x 12"
- 2 squares of low-loft or felt type batting size approximately 16 x 20
- thread
- blank copy paper to make heart patterns
- 1 large bag of pillow fiber-fill (available at department & craft stores)
Assembly Instructions:
1. Cut four pieces of Fabric #1, size 18" x 22".
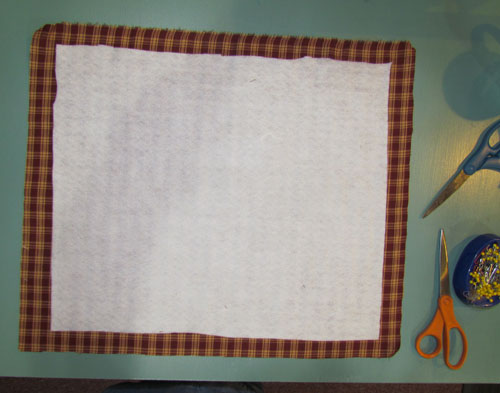
2. Place one cut piece of Fabric #1 on the table and place one piece of the cut felt/batting on top. Align the batting in the center and trim edges if necessary so that the batting is at least 1" smaller than the fabric on all sides.
1. Cut four pieces of Fabric #1, size 18" x 22".
2. Place one cut piece of Fabric #1 on the table and place one piece of the cut felt/batting on top. Align the batting in the center and trim edges if necessary so that the batting is at least 1" smaller than the fabric on all sides.
|

|
4. Now place another cut Fabric #1 piece on top to create a "sandwich" with the batting in the middle. Pin through all layers. This will be the front of the pillow.
5. Repeat using the two remaining Fabric #1 pieces and the remaining felt/batting piece. This will be the back of the pillow.
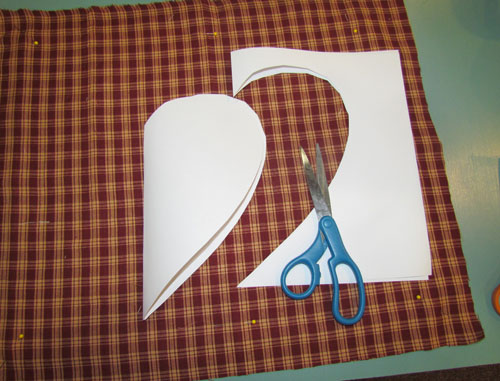
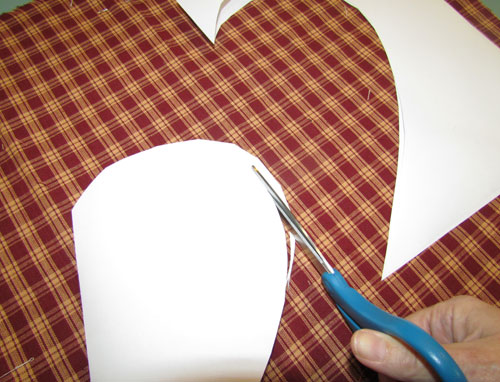
6. Cut out a large heart in whatever size you wish from the blank copy paper. Fold the paper in half and cut half the heart. This way both sides will be identical. If you don't like the shape and need to trim it, fold it back and trim both sides at once.
5. Repeat using the two remaining Fabric #1 pieces and the remaining felt/batting piece. This will be the back of the pillow.
6. Cut out a large heart in whatever size you wish from the blank copy paper. Fold the paper in half and cut half the heart. This way both sides will be identical. If you don't like the shape and need to trim it, fold it back and trim both sides at once.
|
|
|
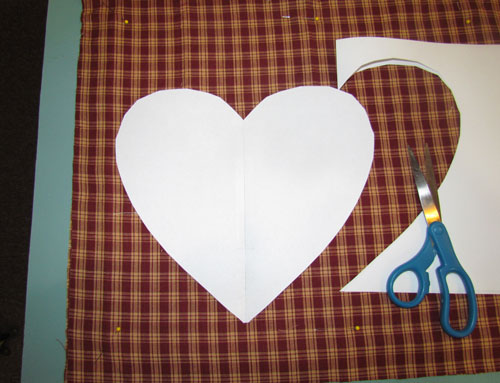
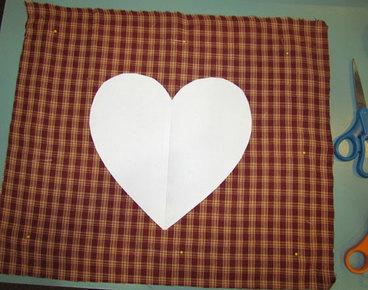
7. The heart pattern should fit into the center of your front panel something like this pic below.
8. Once you are satisfied with the heart shape, trace it onto the burlap scrap and cut it out.
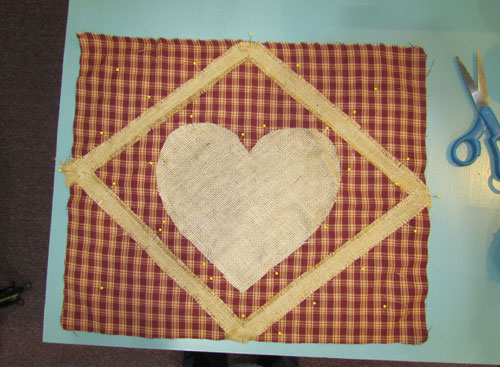
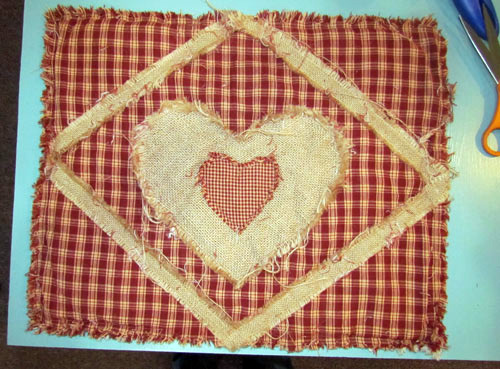
9. Mark the center of each of the four edges. Pin a segment of the 1" burlap ribbon to the front panel going from center mark to center mark diagonally. Just overlap the ends of the burlap but pin them securely. Then pin the burlap heart into the center of the diamond that is formed by the burlap ribbon. See pic below for detail.
9. Mark the center of each of the four edges. Pin a segment of the 1" burlap ribbon to the front panel going from center mark to center mark diagonally. Just overlap the ends of the burlap but pin them securely. Then pin the burlap heart into the center of the diamond that is formed by the burlap ribbon. See pic below for detail.
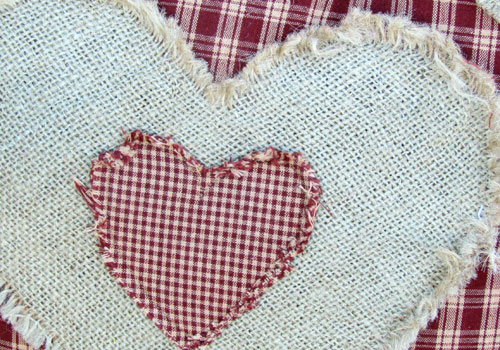
10. Stitch around the heart about 5/8" from the edges. When this is washed, the exposed raw edges will make some real nice burlap-ish fray.
11. Stitch along both sides of the burlap ribbon to secure it to the panel.
12. Cut a smaller heart from Fabric #2 and position it in the center of the big heart. Stitch this one about a 1/4" - 1/2" from the raw edge.
13. Stitch along the bottom of the front panel about 5/8" from the edge. The batting should not be extending this far. If it is, trim it back.
14. Stitch some stitch rows through all three layers of the back panel to secure the batting in place. You can either draw some creative stitch lines to follow with a washable marker or you can just follow the pattern of the fabric and make some grid type rows. Stitch along the bottom of the back panel about 5/8" from the edge. The batting should not be extending this far. If it is, trim it back.
15. Pin the front panel to the back panel with the front side of each panel facing out. Stitch the two together about 1" from the edge. Leave a gap unstitched approximately 6" long at the bottom. This is where you will stuff your finished pillow after it's been washed.
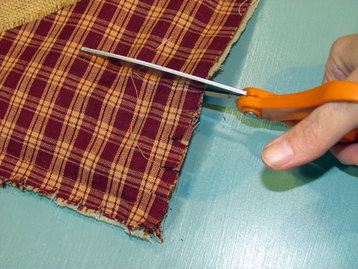
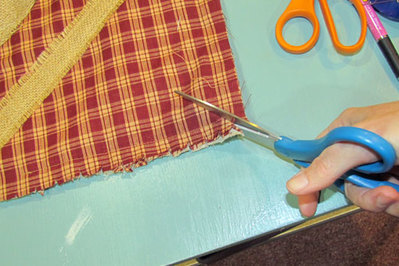
16. Clip this exterior raw edge of both sides with clips that are approximately 1/2" deep and 1/2" apart. Cut the corners diagonally.
*Be very careful that you don't cut into the stitch line. If you do, restitch it immediately and seal it with a dab of liquid sealer like No Fray so that it won't continue to fray.*
11. Stitch along both sides of the burlap ribbon to secure it to the panel.
12. Cut a smaller heart from Fabric #2 and position it in the center of the big heart. Stitch this one about a 1/4" - 1/2" from the raw edge.
13. Stitch along the bottom of the front panel about 5/8" from the edge. The batting should not be extending this far. If it is, trim it back.
14. Stitch some stitch rows through all three layers of the back panel to secure the batting in place. You can either draw some creative stitch lines to follow with a washable marker or you can just follow the pattern of the fabric and make some grid type rows. Stitch along the bottom of the back panel about 5/8" from the edge. The batting should not be extending this far. If it is, trim it back.
15. Pin the front panel to the back panel with the front side of each panel facing out. Stitch the two together about 1" from the edge. Leave a gap unstitched approximately 6" long at the bottom. This is where you will stuff your finished pillow after it's been washed.
16. Clip this exterior raw edge of both sides with clips that are approximately 1/2" deep and 1/2" apart. Cut the corners diagonally.
*Be very careful that you don't cut into the stitch line. If you do, restitch it immediately and seal it with a dab of liquid sealer like No Fray so that it won't continue to fray.*
|
|
17. Machine wash the pillow flat on cold. Add about 1/4 cup table salt if you wish to keep darker colors from bleeding. Take it outside and shake loose strings out before putting it in your dryer. You'll probably still want to stop the dryer at some point and clean the lint trap at least once before it's finished.
18. After drying, touch up lightly with an iron if needed and remove all the loose strings and any "shabbiness" that you may find unattractive. The picture below is how mine looked straight out of the dryer. I trimmed a lot of the big frays and strings.
18. After drying, touch up lightly with an iron if needed and remove all the loose strings and any "shabbiness" that you may find unattractive. The picture below is how mine looked straight out of the dryer. I trimmed a lot of the big frays and strings.
19. Stuff your pillow with the fiber-fill and machines stitch or hand stitch the opening. Enjoy your Burlap Sweetheart Pillow!
|

|