
Christmas Light Burlap/Tobacco Cloth Garland
Materials Needed:
- 1 String of Christmas lights (we used white lights but colored light would look awesome too!)
- Burlap fabric that is at least 5" wide.
- Light weight Tobacco Cloth
- A pair of scissors
- Artificial pine Christmas garland
- A stapler
This Christmas garland was super easy and super quick! This is a great way to add a little extra to your garland!

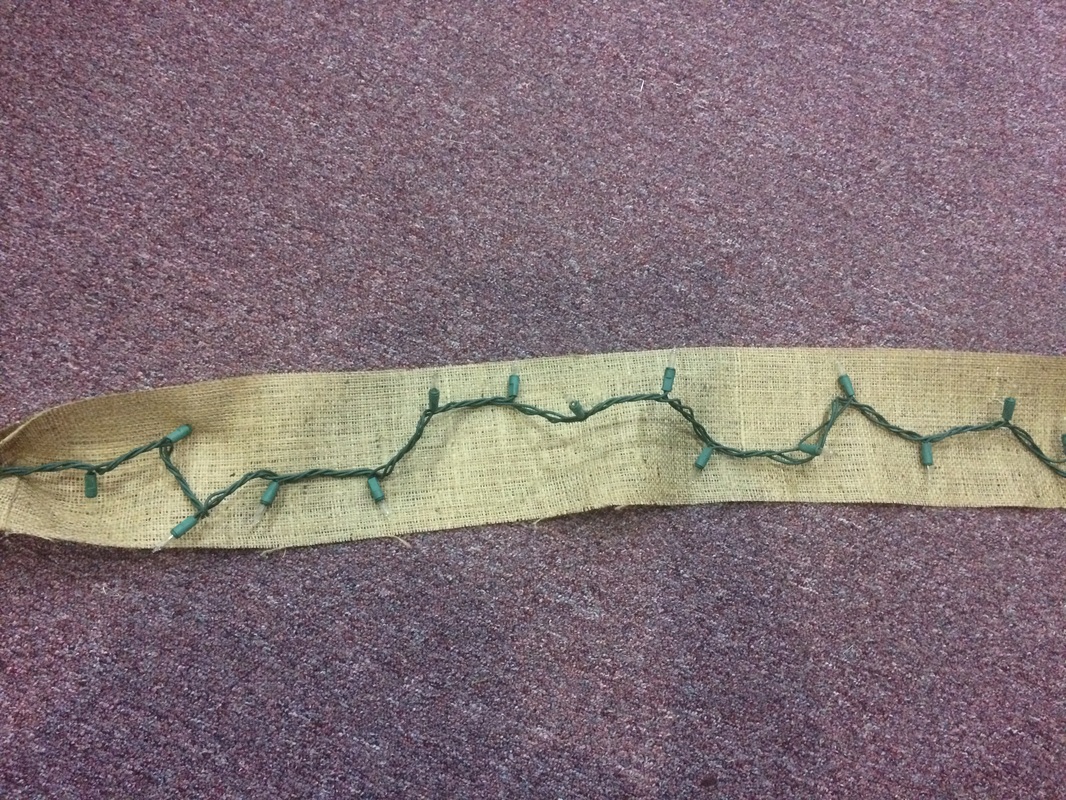
1. The first thing you need to do is grab your 5" wide burlap and lay it out on the floor! It took us about 6 yard to cover the entire strand but it will vary depending on the length of your Christmas lights, then lay your Christmas lights on top of your burlap.
2. Make sure you leave the plug in out, start your burlap where your lights start.
2. Make sure you leave the plug in out, start your burlap where your lights start.
3. Grab the top part of the burlap and bring it to the bottom and staple it together to create a seam. You don't have to be very neat with this, just as long as you get the burlap around the lights.
4. After you staple all the way down your lights, poke some of the lights through the burlap. We left some of the lights inside and poked some of them out to create different looks.
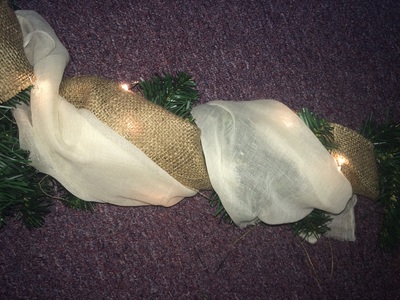
5. Lay out your greenery and wrap your burlap lights around it evenly.
6. Next we added some tobacco cloth! We used a few pieces of scrap light weight Antique Ivory Tobacco cloth that was 1 yard by about 11 inches.
7. Wrap the tobacco cloth around the very end right where you started with your burlap Christmas lights
8. Tie it around the greenery and position it under the burlap so that the knot isn't seen
9. Continue to wrap the tobacco cloth around the greenery alternating around the burlap lights
10. After you are finished wrapping situate the tobacco cloth so that it looks more draped and you can see the lights through the fabric, then you are done and you're ready to decorate!
10. After you are finished wrapping situate the tobacco cloth so that it looks more draped and you can see the lights through the fabric, then you are done and you're ready to decorate!