
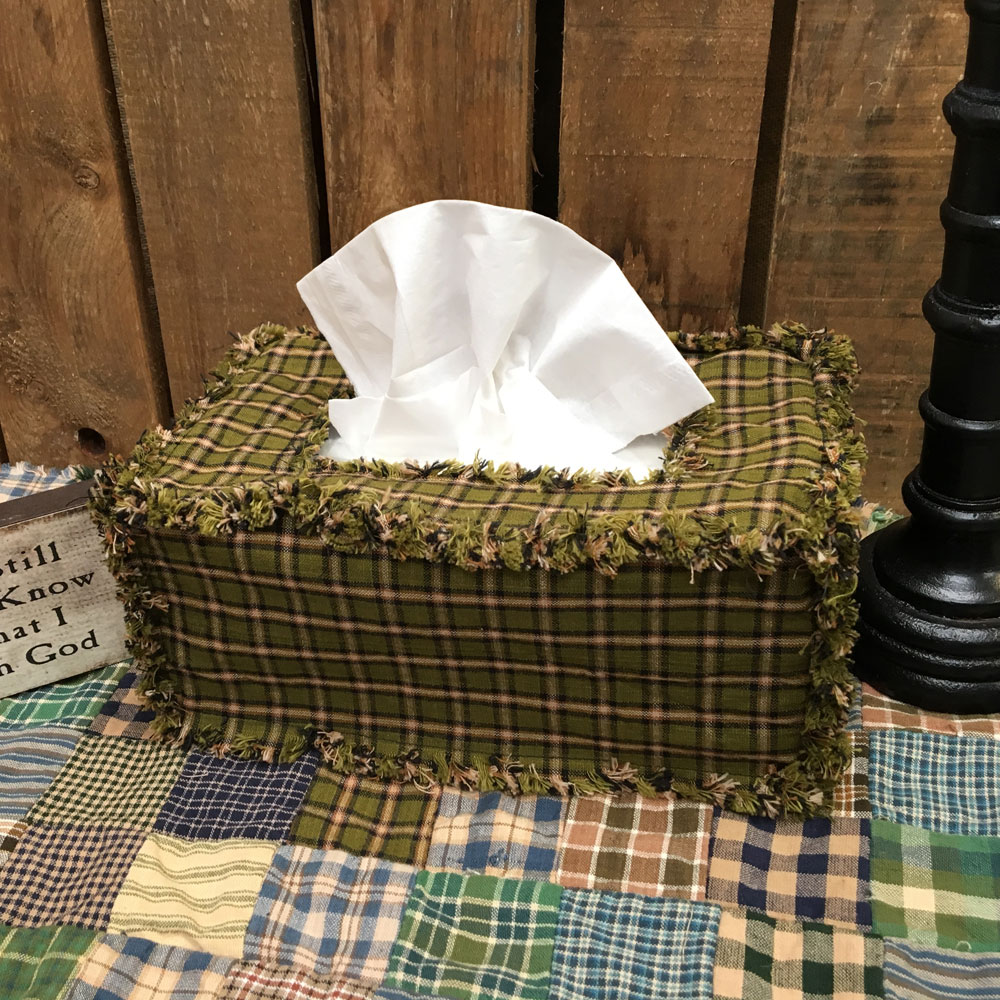
Frayed Fabric Tissue Box Cover
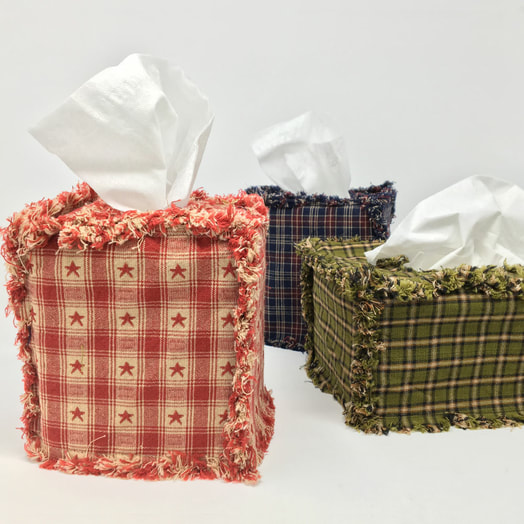
This adorable ragged and frayed tissue box cover is perfect for your desk or anyplace in your home. Below you'll find some simple step-by-step instructions for creating this fun accessory.
Materials:
1. Measure the sides and the top of your tissue box. Add 1" to the width and 1" to the height and make templates from card stock. The center hole for the top can be any shape but it should be small. After all the fraying is done, that center hole will be about 1 inch bigger than the template.
- 1/2 yard (or two fat quarters) homespun fabric of your choice. Regular quilting cotton will not fray like homespun cotton.
- 2 pages stiff card stock or other material for making a template.
- All seams are 1/2" wide.
- Rag stitching is very forgiving so don't obsess over lining everything up perfectly. Close enough is good enough!
- Most tissue boxes are not perfect squares. If that is the case, you will have two sides that are wider. The example in these instructions had one side that was about 1/4 inch wider than the other side. If the difference is less than that, just use the larger measurement and make all four sides the same.
1. Measure the sides and the top of your tissue box. Add 1" to the width and 1" to the height and make templates from card stock. The center hole for the top can be any shape but it should be small. After all the fraying is done, that center hole will be about 1 inch bigger than the template.
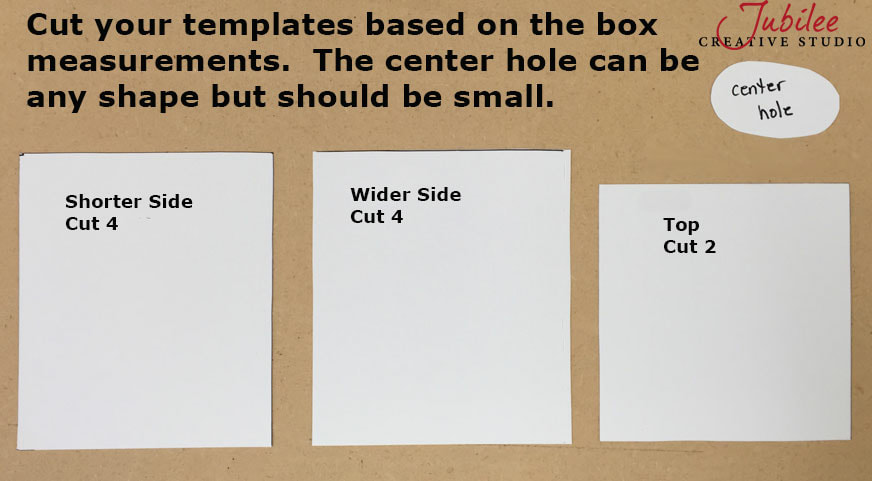
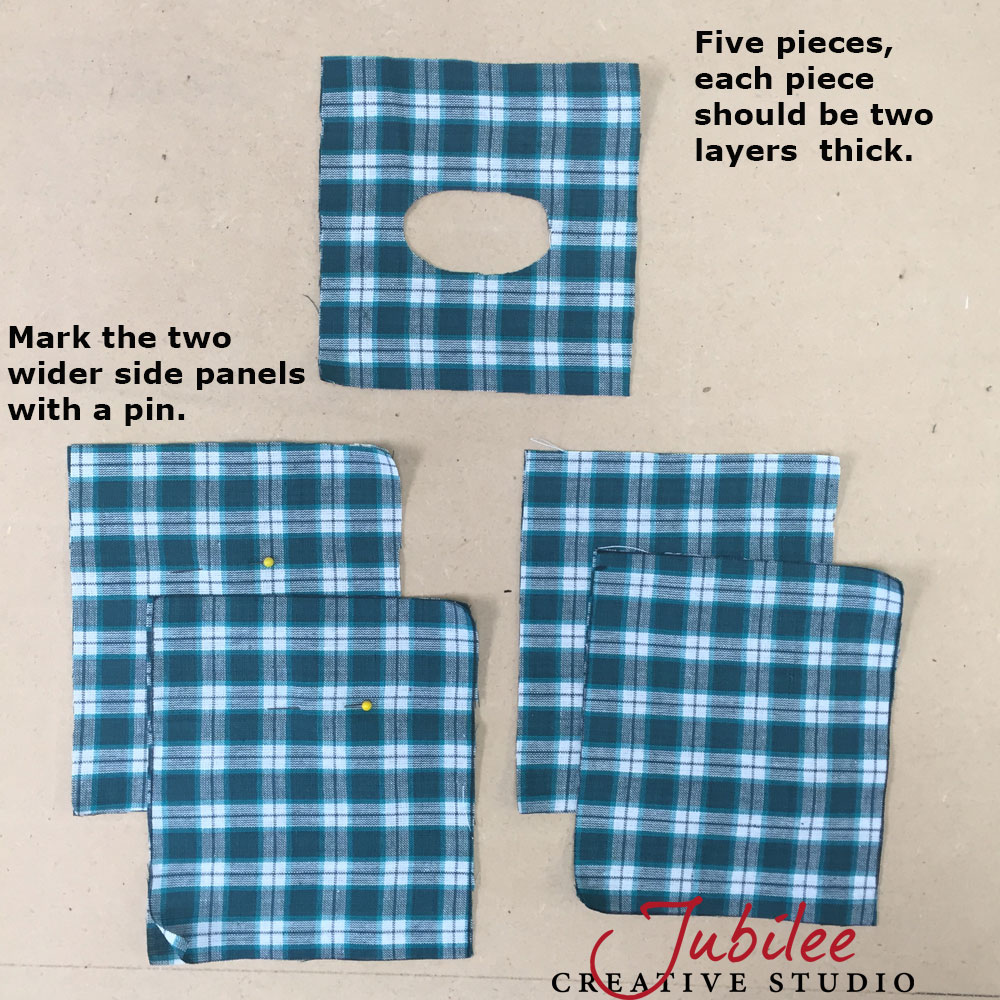
2. Use these templates and cut 8 side pieces and 2 top pieces. Make each side and the top 2 layers thick so that you ultimately have 5 pieces as shown below. If you have a wider side, mark the wider sides with a pin.
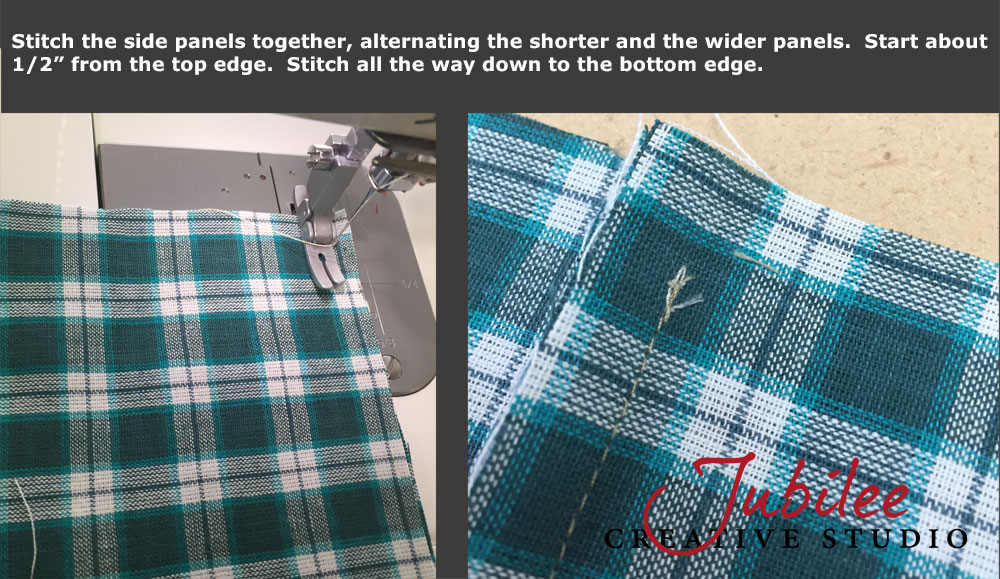
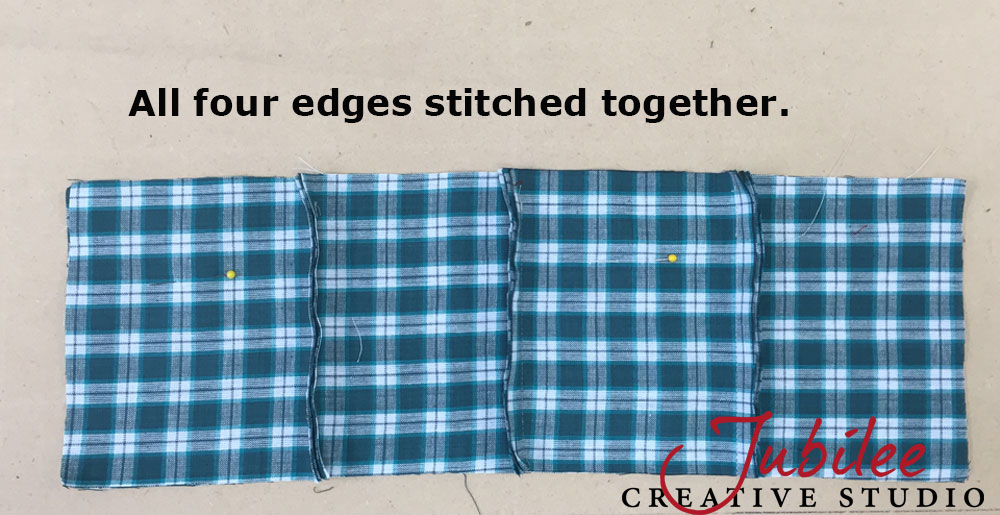
3. Stitch the side pieces together as shown below with 1/2 inch seams. Alternate the shorter and the wider panels. Start the stitching about 1/2" from the top edge. Stitch all the way down to the bottom edge.
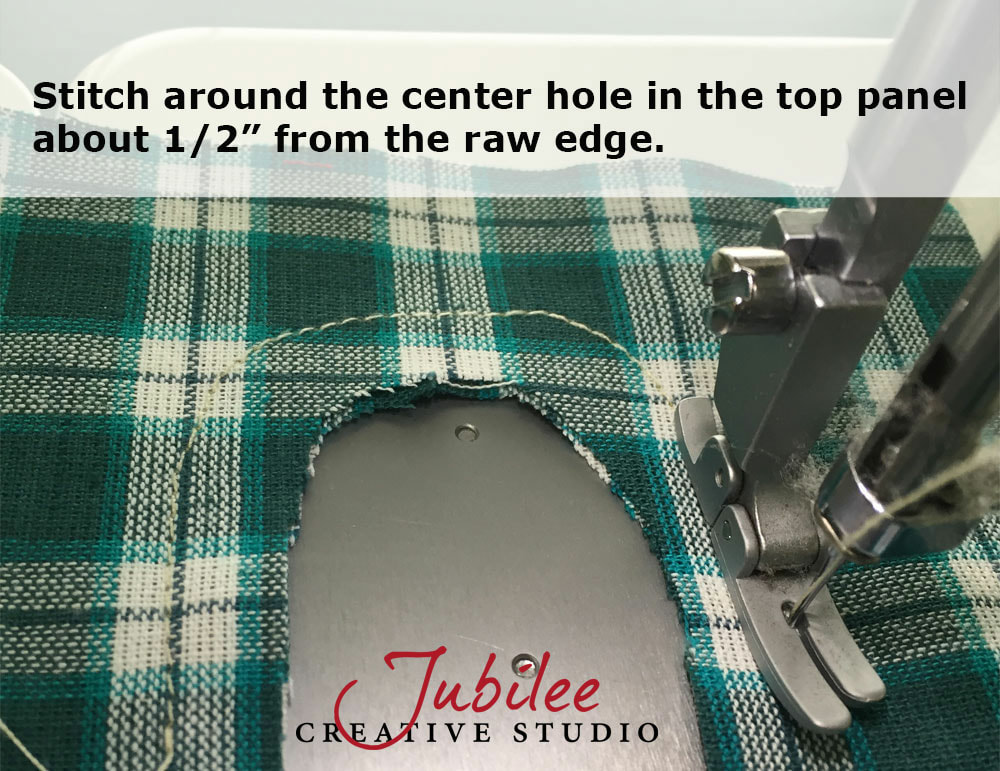
4. Stitch around the center hole of the top about 1/2" from the raw edge.
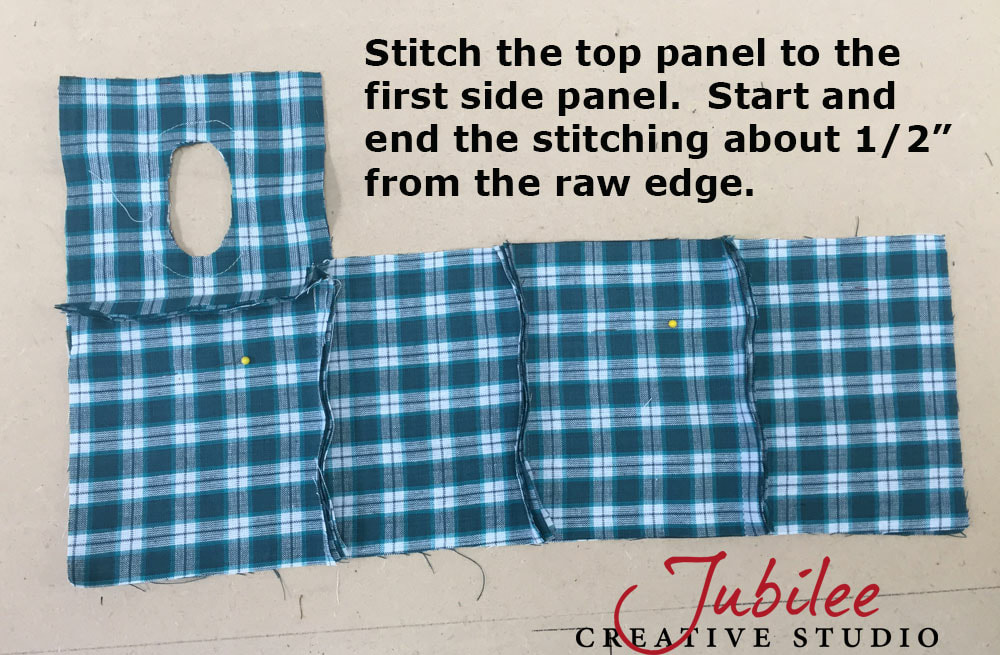
5. Stitch the top to the first side panel. Start about 1/2" from the raw edge and finish about 1/2" from the raw edge.
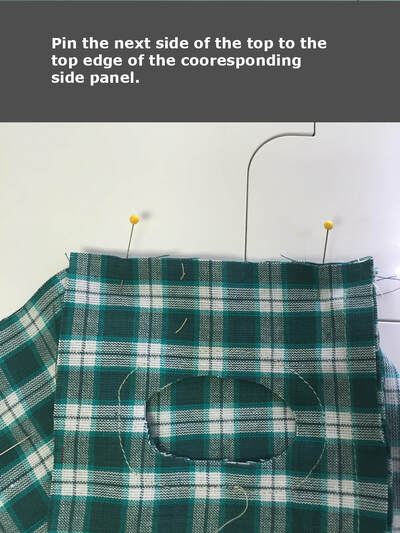
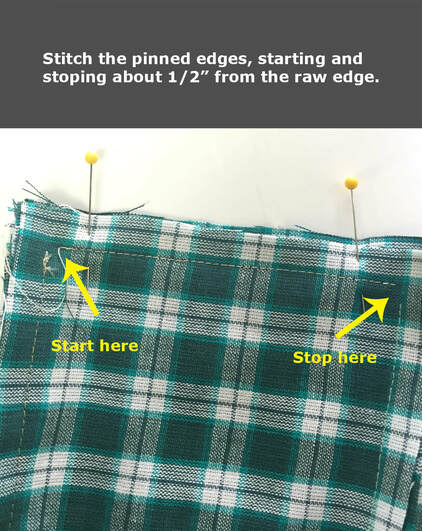
6. Stitch the remaining sides to the top, stitching one seam at a time. Start and stop the seams about 1/2" from the raw edges as shown in the pictures below.
|
|
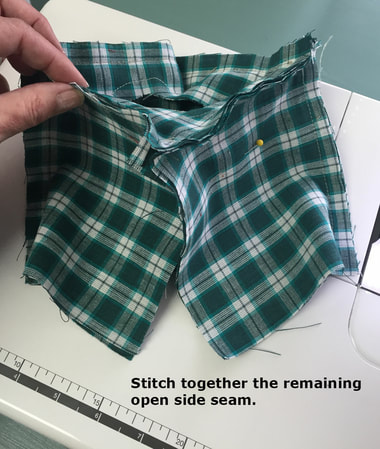
7. Stitch the last remaining side seam together. Start about 1/2" from the top edge and stitch all the way to the bottom.
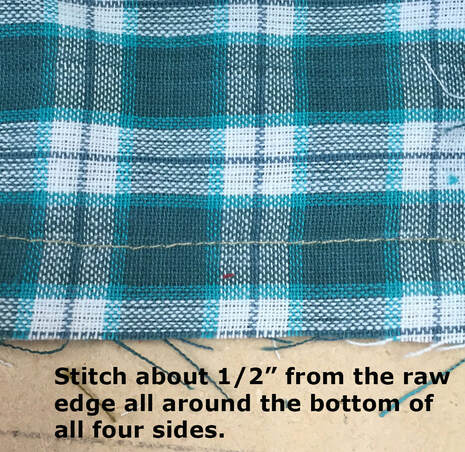
8. Stitch about 1/2" from the raw edge all around the bottom of all four sides.
8. Stitch about 1/2" from the raw edge all around the bottom of all four sides.
|
|
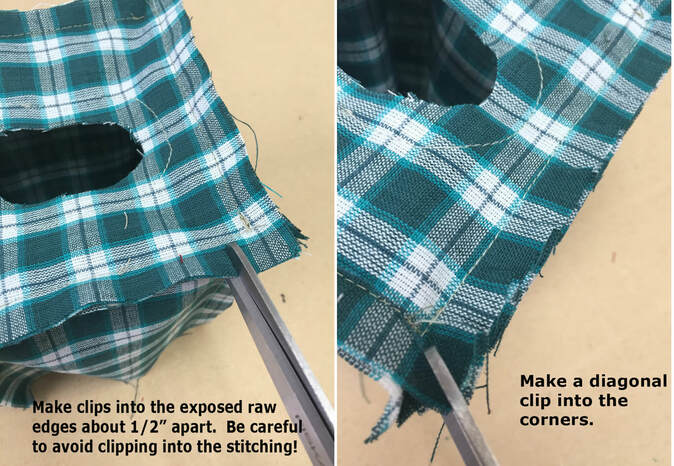
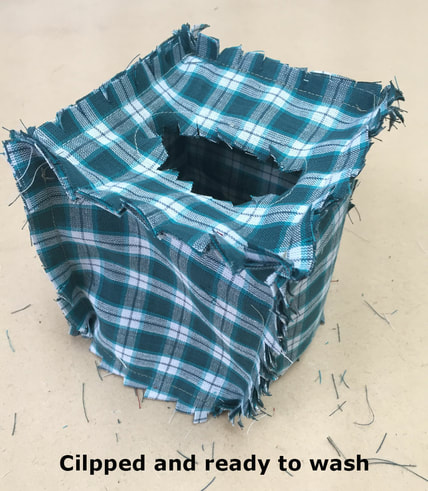
9. Now the stitching is done! It's time to clip all those exposed raw edges so that when it is washed, they will turn into the beautiful fray! Make clips about 1/2" apart into all the raw edges. Don't forget the edges around the hole at the top and the bottom edges. Make a diagonal clip into the corners. Be very careful not to clip into the stitching.

|
|
10. Now to create the fluffy "fray" shabby look: Machine wash and dry. Yep, it's really that easy! If you use homespun fabric and clip the exposed seam allowances, your washing machine will do all the work for you! Use a liquid fabric softener if possible to loosen the strings and add about 1/4 cup of table salt to the wash water to help set the colors and prevent fading.

|

|