
Ragged Patchwork Journal Book Cover

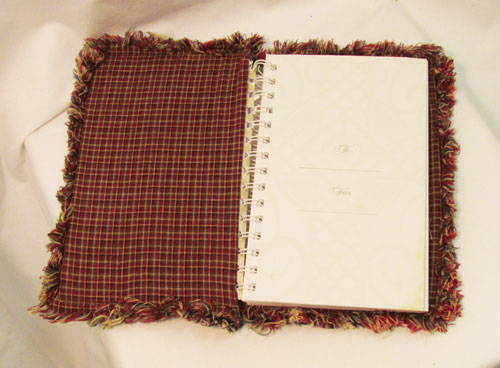
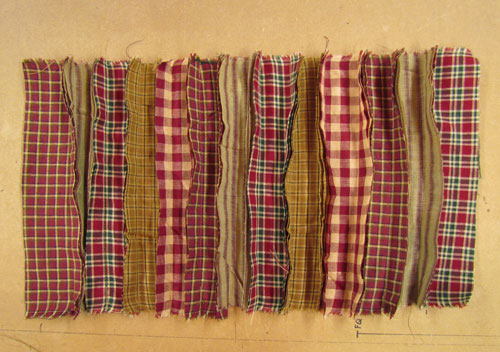
To stitch up this adorable patchwork ragged journal cover, all you will need is an assortment of homespun fabrics (usually scraps and leftovers will work) and a book or journal. Spiral bound is the easiest to fit but this process will work with just about any style journal. Continue to read below to see our easy step-by-step instructions with pictures.
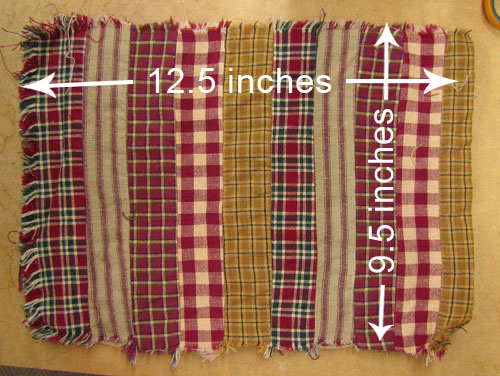
Pre-wash your scraps and then iron them out flat. Measure your journal as shown below:
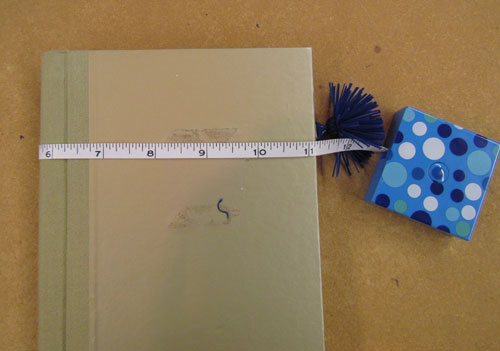
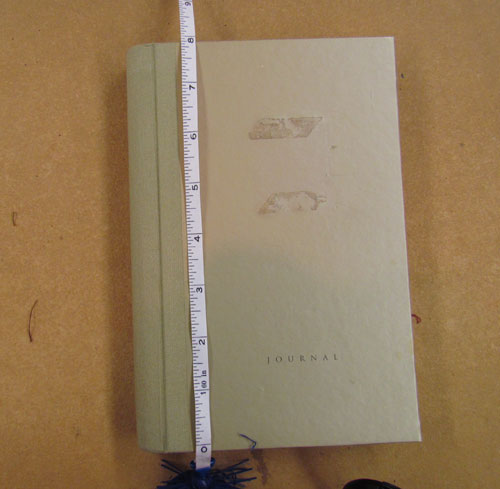
1. Wrap a tape measure around your journal from the back to the front. Now add 1.5 inches. This measurement will be the TW (Total Width). In our example below, the TW is 12.5 inches.
1. Wrap a tape measure around your journal from the back to the front. Now add 1.5 inches. This measurement will be the TW (Total Width). In our example below, the TW is 12.5 inches.
2. Now measure the height of your journal from the bottom to the top. Add 1.5 inches. This measurement will be the H (height). In our example below, the H is 9.5 inches
3. Now open the journal and measure the width of the inside cover. Add 1/2 inch. Now multiply by 2. This measurement will be CW (cover width). In our example below, the CW is 11 inches

4. You should write down these measurement on a piece of paper that you can keep handy. Our example measurements are:
- TW = 12.5 inches
- H = 9.5 inches
- CW = 11 inches

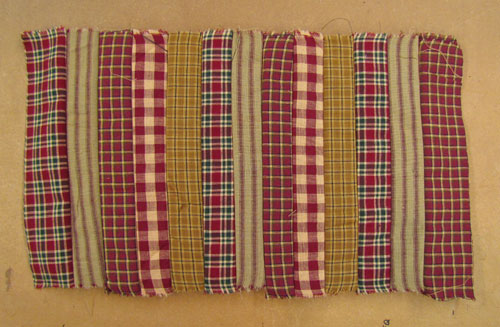
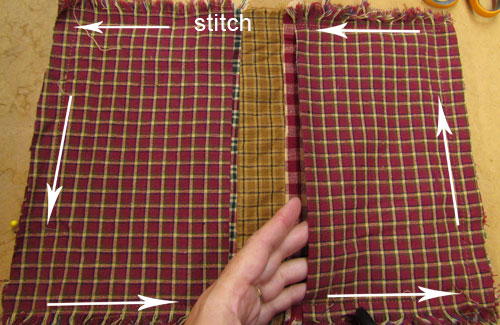
6. Stitch the strips (both layers) together lengthwise with a 5/8 inch seam.
7. The side with the seam allowances (shown above) will be the front side. The side with the seam allowances (shown below) will be the back side.
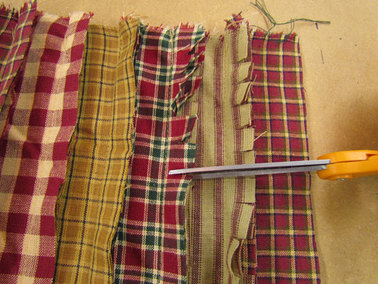
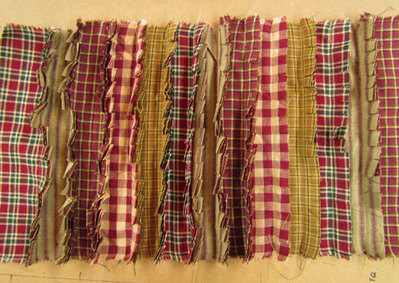
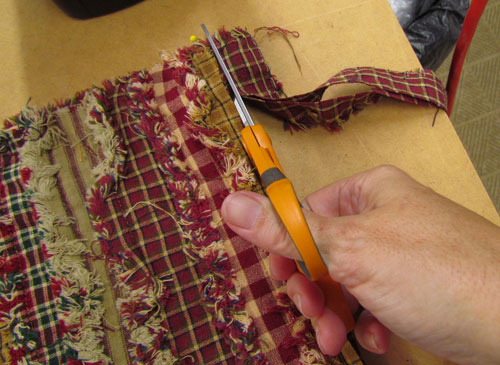
8. Now clip all those exposed seam allowances. You will find more instructions about clipping the seam allowances here: Clipping Seams for Rag Quilts.
|
|
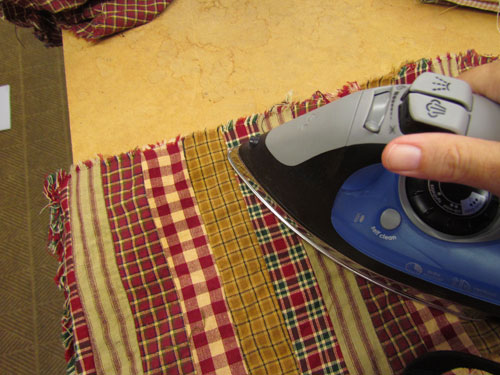
9. Press the pieced panel flat from the back side. It doesn't matter which way the clipped seam allowances fall.
10. Trim the pieced panel be TW x H.
11. Cut two pieces of homespun fabric to this size: CW x H. Fold the CW side in half and press. Do this for both pieces. These will be your inside covers.

12. Lay the inside covers on top of the pieced panel with about a 1.5 inch gap between them. The folded side should be on the inside. Pin in place.
13. Trim the excess off the inside covers to match up with the pieced panel.
13. Trim the excess off the inside covers to match up with the pieced panel.
14. Stitch with a small tight stitch all the way around the perimeter of the pieced panel.
15. Clip the outer edges.
16. Machine wash. Using a liquid fabric softener will help the strings work loose. Tumble dry and use a lint roller to remove the excess strings.
16. Machine wash. Using a liquid fabric softener will help the strings work loose. Tumble dry and use a lint roller to remove the excess strings.