Queen Size Printed Quilting Cotton & Homespun Combo Quilt
|

|
Homespun plaids are so wonderful to work with because they are the same on both sides and quickly stitch up into easy and forgiving rag quilts. We all love homespun, right? But occasionally my heart & eyes long for something more whimsical that only a printed fabric can offer. For that reason, I have created this tutorial below showing you how I combined both the easy/quick attributes of homespun with an eye pleasing assortment of traditional printed quilting cottons.
There is one VERY important thing you must do if you are going to combine homespun and traditional cotton. Both fabrics must be preshrunk and pressed before you start cutting. This is because homespun will shrink more than the traditional cotton and preshrinking both eliminates that little discrepancy right away. This style quilt will use a lot of fabric because the seams are wide to make the fray and the printed quilting cotton is done as an applique. I suggest you might want to choose your background fabric from either our Solids & Semi Solid Homespun category or our Soft Basic Homespun category. Many of those fabrics would make a good background to printed cottons.
For a queen size quilt and 2 shams, you will need:
Rag Quilting Tips
General Rag Quilt Instructions
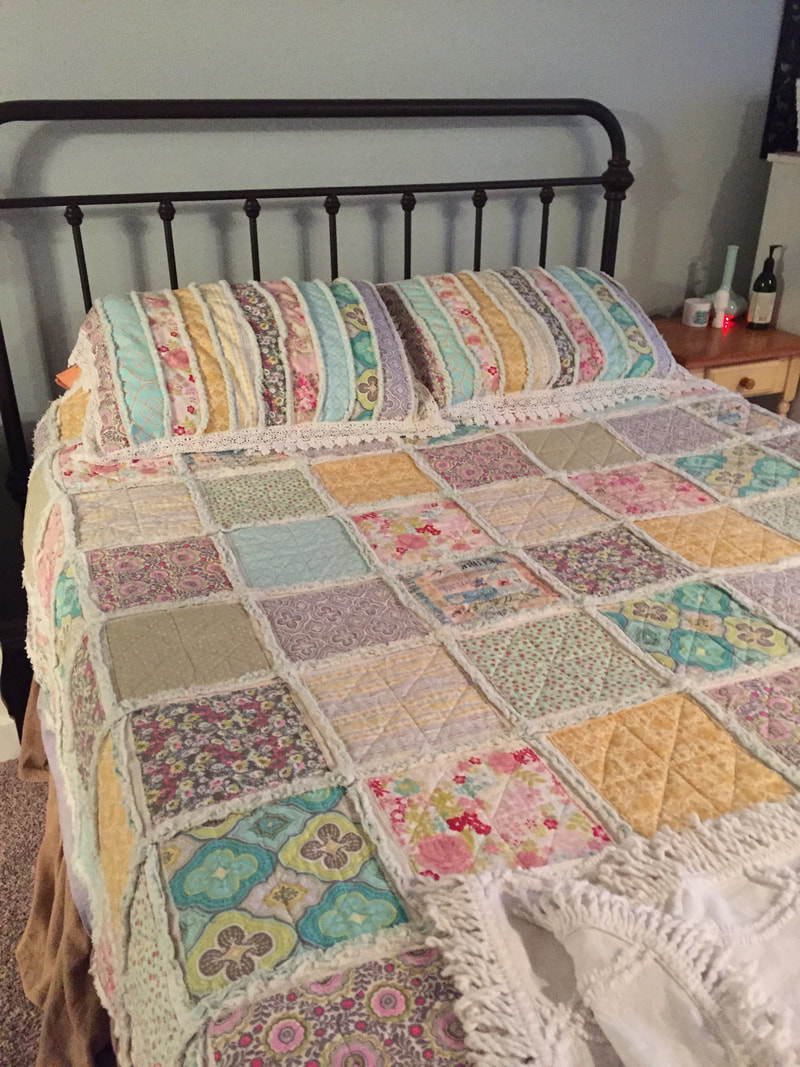
In these pictures you will see that I also made some matching shams. Unfortunately I did not document that so I do not have instructions for it. They were created in the same technique using basic queen size sham measurements. I'm so sorry I don't have better instructions for the shams but they should be pretty easy to freestyle.
Cutting Instructions:
Stitching Instructions:
There is one VERY important thing you must do if you are going to combine homespun and traditional cotton. Both fabrics must be preshrunk and pressed before you start cutting. This is because homespun will shrink more than the traditional cotton and preshrinking both eliminates that little discrepancy right away. This style quilt will use a lot of fabric because the seams are wide to make the fray and the printed quilting cotton is done as an applique. I suggest you might want to choose your background fabric from either our Solids & Semi Solid Homespun category or our Soft Basic Homespun category. Many of those fabrics would make a good background to printed cottons.
For a queen size quilt and 2 shams, you will need:
- 20 yards of homespun fabric (44-45" wide) - This will be the backing of the quilt and a slight border & fray around the front of the appliques. I used an off white for the top (10 yards) and a light plaid for the back (10 yards).
- 7 yards of assorted printed quilting cotton (44-45" wide)
- 1 roll of low loft poly or cotton queen size batting
- pinking shears
Rag Quilting Tips
General Rag Quilt Instructions
In these pictures you will see that I also made some matching shams. Unfortunately I did not document that so I do not have instructions for it. They were created in the same technique using basic queen size sham measurements. I'm so sorry I don't have better instructions for the shams but they should be pretty easy to freestyle.
Cutting Instructions:
- Pre-wash and press the homespun and the printed cotton. The homespun will be more manageable in the wash if you cut it into 2 or 3 smaller lengths. Clip those raw edges before you wash so you don't have a string tied mess coming out of the dryer.
- From the homespun cut (242) 10 inch squares. Pre-clip the edges now if you wish or you can wait and clip after stitching. More details are here on clipping the raw edges.
- From the printed quilting cotton cut (121) - 7.5 inch squares. Use pinking shears to cut these and do NOT clip these edges.
- From the batting cut (121) 8 inch squares.
Stitching Instructions:
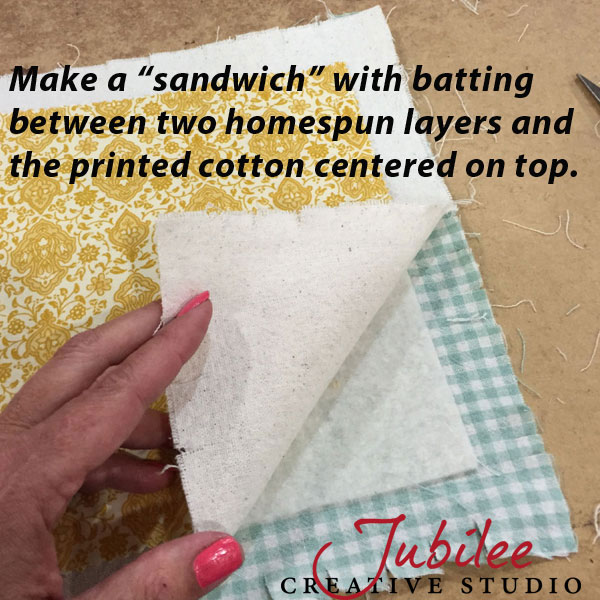
- Create a "sandwich" from two homespun squares with a batting square centered in between them. Now center a printed quilting cotton square on top and pin in place.
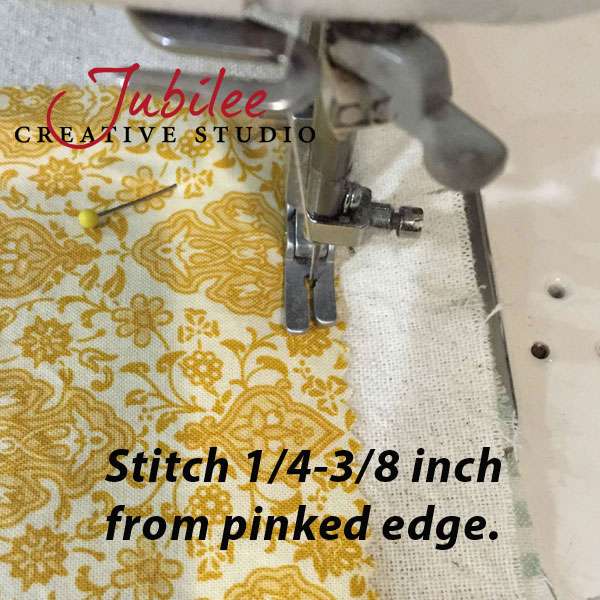
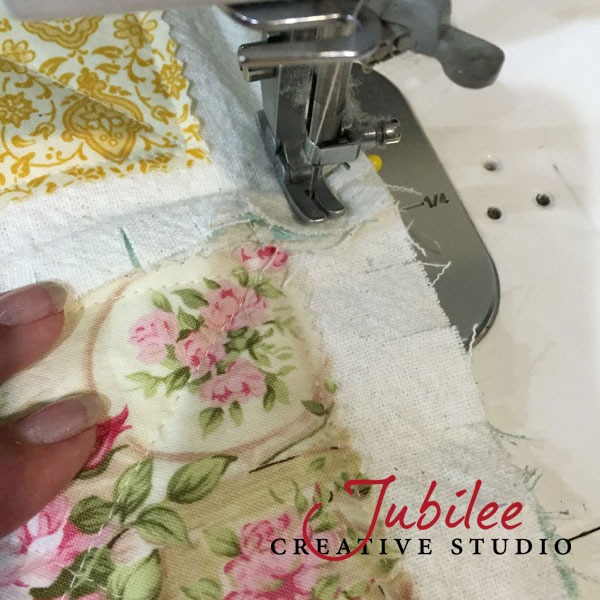
- Stitch through all thicknesses around the perimeter of the printed square about 1/4" from the pinked raw edge. This pinked edge will curl up nice and soft after it's washed the first time. It's a nice compliment to the homespun fray.
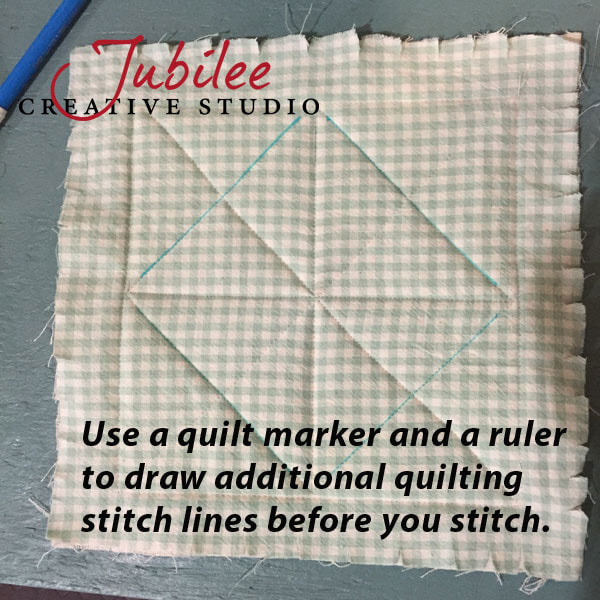
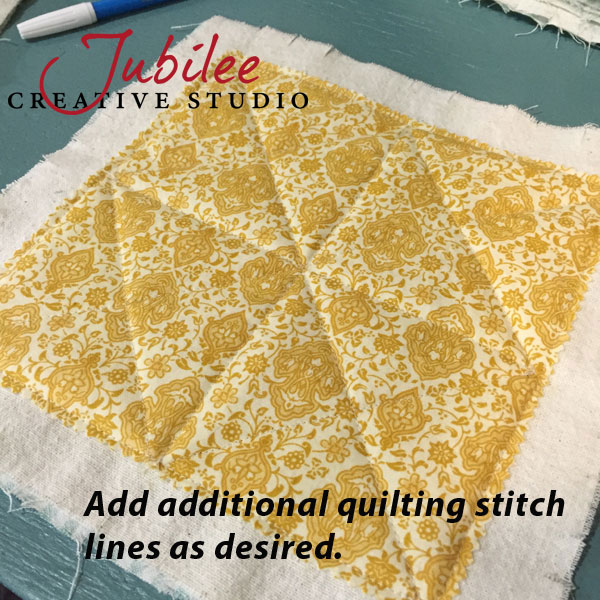
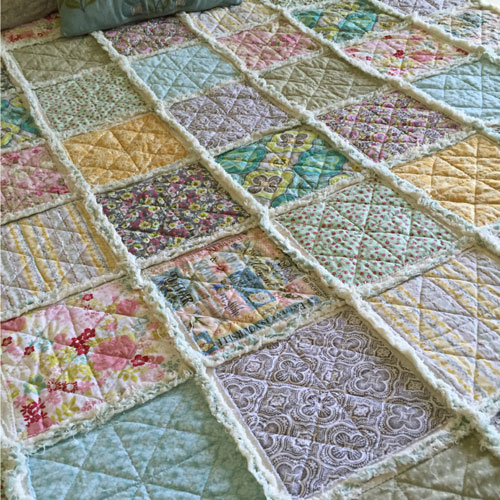
- Stitch some more lines as you wish in the square to "quilt" it and secure the batting and fabric in place. The more quilting lines you add, the more durable the quilt will be. In this particular quilt, I stitched corner to corner and also an interior diamond shape.
- Layout your squares/blocks in the floor and arrange/rearrange until you are satisfied. (This might be the hardest part!)
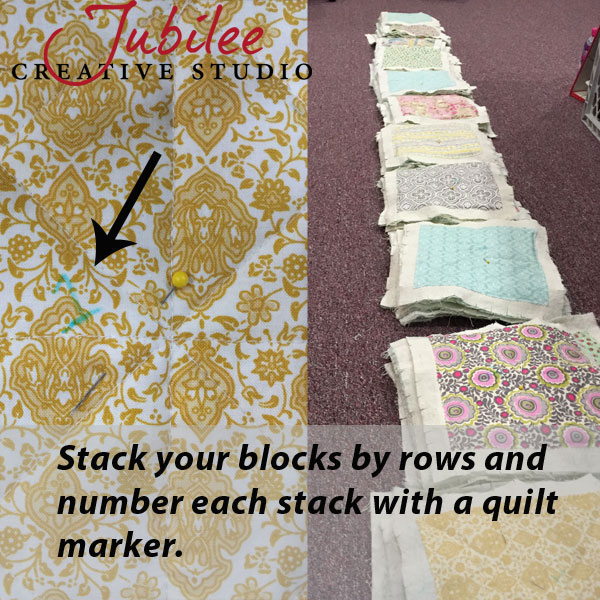
- Stack the blocks in each row with the first block on top. Number the rows 1 through 11 with a quilt marker. (It will disappear in the wash)
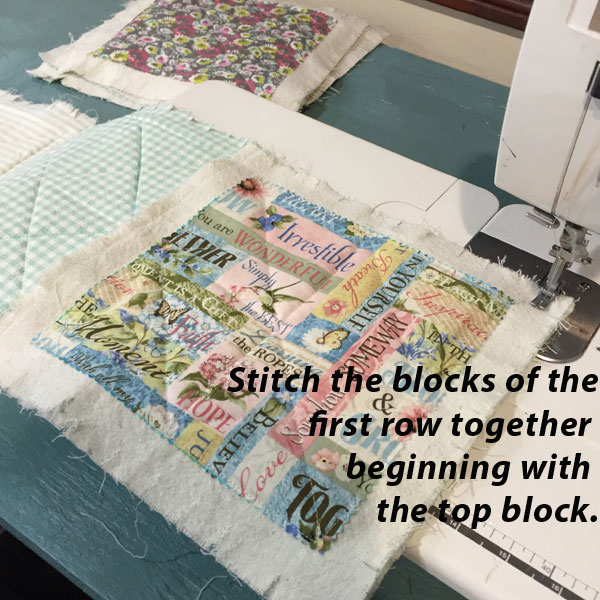
- Stitch the blocks of the first row together beginning with the first block. Seams should be 5/8" and seams allowances should be on the same side as the printed applique square. Do the same with the second row.
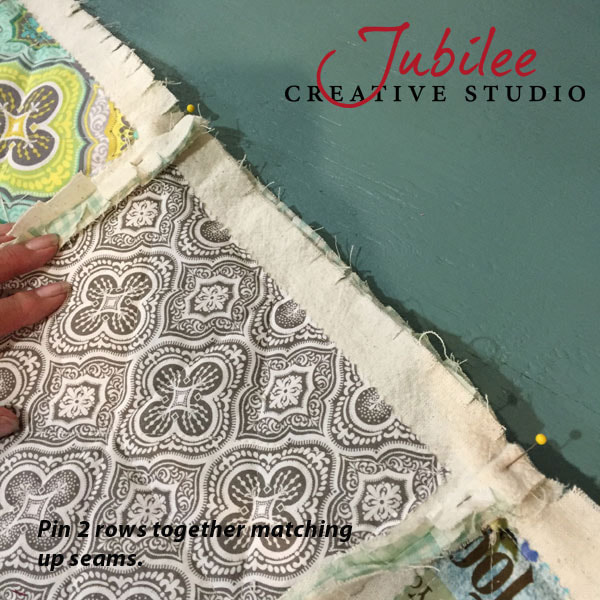
- Now pin the first row to the second row, matching up the seams. Again, seam allowances should be on the same side as the printed applique squares. Make sure you have the first block of each row matched up so that the initial design layout you did will be preserved.
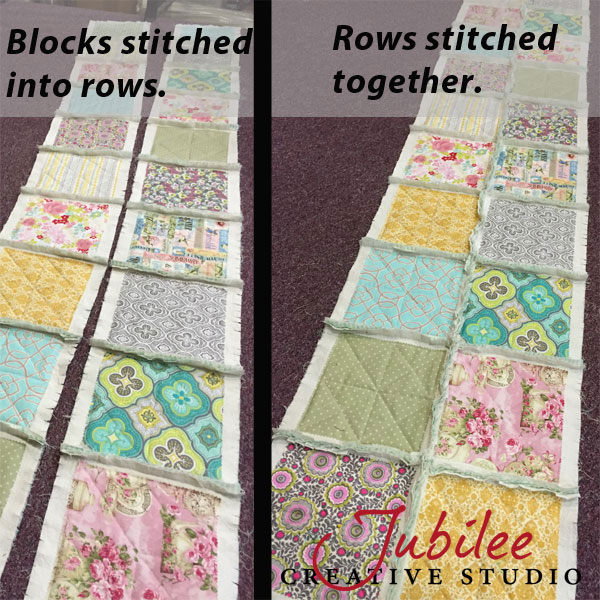
- Stitch the two rows together again with a 5/8" seam. This seam allowance is what will become the beautiful fray after it's washed.
- Stitch the blocks of row 3 together in the same way you did row 1 & 2. Pin row 3 to row 2 and stitch. Continue in the pattern until all the blocks are stitched into rows and all the rows are stitched together.
- Stitch around the perimeter of the quilt about 3/4" from the raw edges to stabilize those edges.
- If you didn't pre-clip your homespun, now is the time to clip all the exposed raw edges. Don't forget to clip the perimeter.
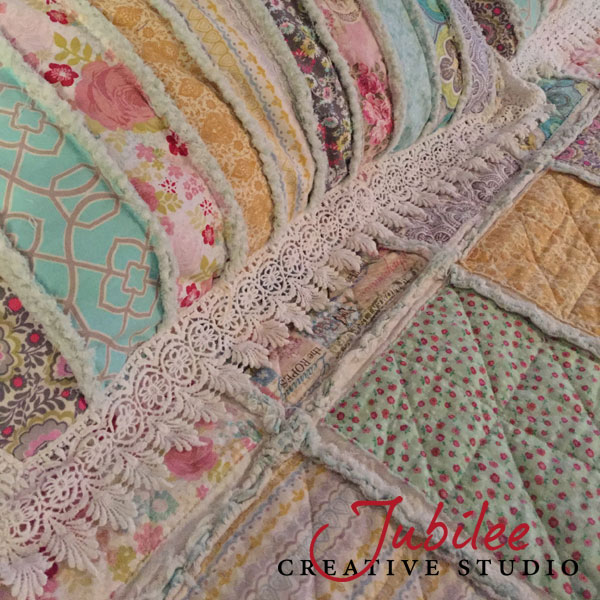
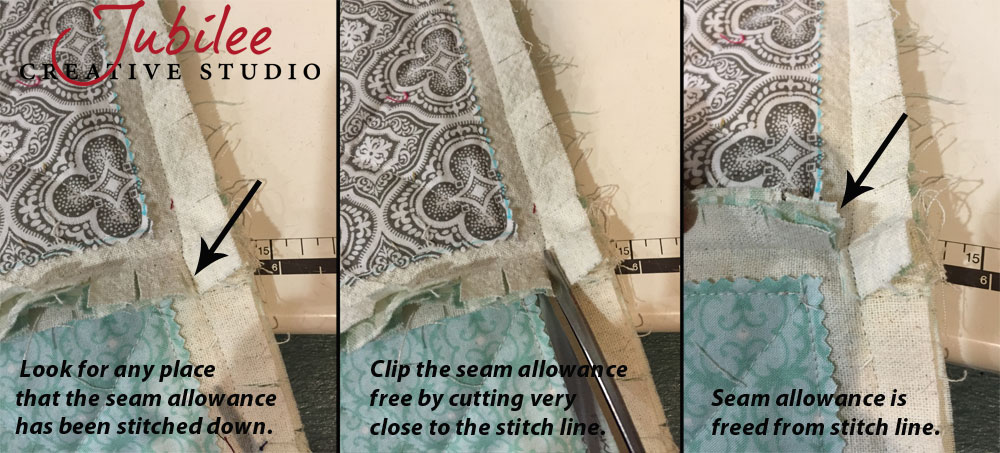
- Even if you did pre-clip, you will need to look for the places where the seam allowance is stitch down. Clip the allowances free from the stitching. See the pic at the bottom of this page for close up detail of this.
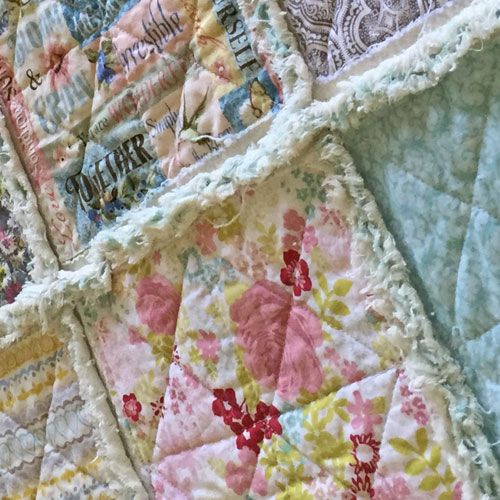
- Machine wash your quilt in cold water and tumble dry to create the fray. A liquid fabric softener can help loosen strings. Be prepared to stop the dryer a couple of times to removed the strings that will come loose.
- Shake the finished quilt outside to remove excess strings still hanging on and finish off with a lint roller. A few more strings will continue to work loose in the next few washings but it will soon stabilize.
Click on the images in the gallery below to see the notes on each one.