
Simple Ragged Quilt Throw
approximately 56" x 64"
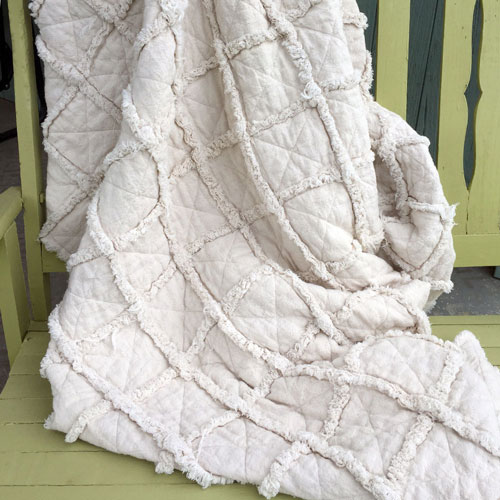
This Simple Ragged Quilt Throw can be adapted to so many different styles by just altering the color, design and/or layout of the fabric used. The off-white fabric throw shown above is used year 'round at our house and the neutral color of the Ecru homespun fabric blends well in any of our rooms. What makes this design especially nice is that it's one of the easiest, most simple rag style quilts you could make. This quilt is perfect for the beginner but it's beautiful enough to please and impress anyone.
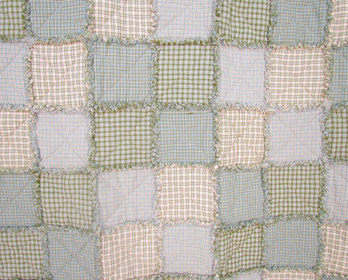
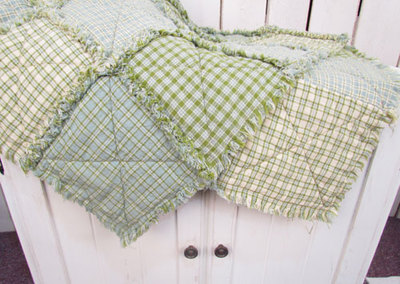
If you are feeling creative, you can mix up different fabrics to make a design or just use your scrapbag for a random patchwork style. Below is a quilt that I made for my daughter-in-law's birthday using four different homespun fabrics laid out in a repetitive design.
If you are feeling creative, you can mix up different fabrics to make a design or just use your scrapbag for a random patchwork style. Below is a quilt that I made for my daughter-in-law's birthday using four different homespun fabrics laid out in a repetitive design.
|
|
The instructions below will walk you through the assembly of the quilted throw using one single fabric. Alter this as you wish with different fabrics or colors to create your own unique quilted throw. The instructions and materials specify 6" squares but the assembly is the same no matter what size squares you choose to use. Check out our Rag Quilt Chart for a nice reference showing fabric requirements for different size quilts and different size squares.
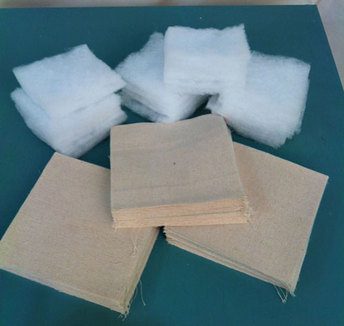
To make this quilt throw in the single fabric style, you will need about 10 yards of homespun fabric, a small or twin size package of low loft poly or cotton batting, and thread. Doesn't get much simpler than that, huh?
You'll need to cut out:
To make this quilt throw in the single fabric style, you will need about 10 yards of homespun fabric, a small or twin size package of low loft poly or cotton batting, and thread. Doesn't get much simpler than that, huh?
You'll need to cut out:
- 336 six inch squares of homespun fabric in your choice color(s) depending on your desired design.
- 168 squares of low loft poly or cotton batting, each square approximately 4.5"
|
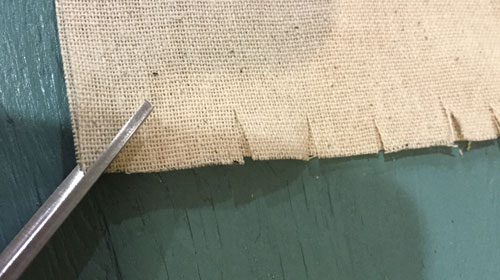
**IMPORTANT: You will need to backstitch and tie down all seams as is normal but with rag stitching, you will want to make those tie downs about 5/8" from the raw edge. This is because the last 5/8" will become "fray" in the final product and will not hold the tie down stitching.
|
- Now with a 5/8" seam allowance, stitch your squares together in long rows with 14 squares in each row. Tie down your stitching about 5/8" in from the beginning and the ending. This is because the last 5/8 of the seam will become "fray" and will not hold a tie down stitch.
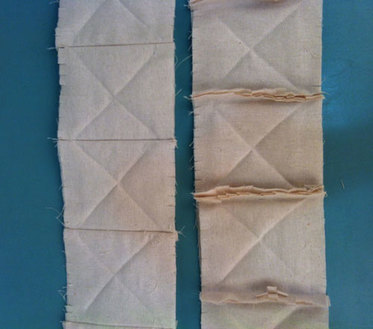
- The side with the raw seam allowances showing is the front side of this quilt. The next image shows the front of the strip on the right and the back of the strip on the left.
- Now stitch those long rows together. Match up the seams to keep things even. Remember to keep all the raw seam allowances on the front side. Stitch all the way around the perimeter of the quilt about 3/4" from the raw edge.
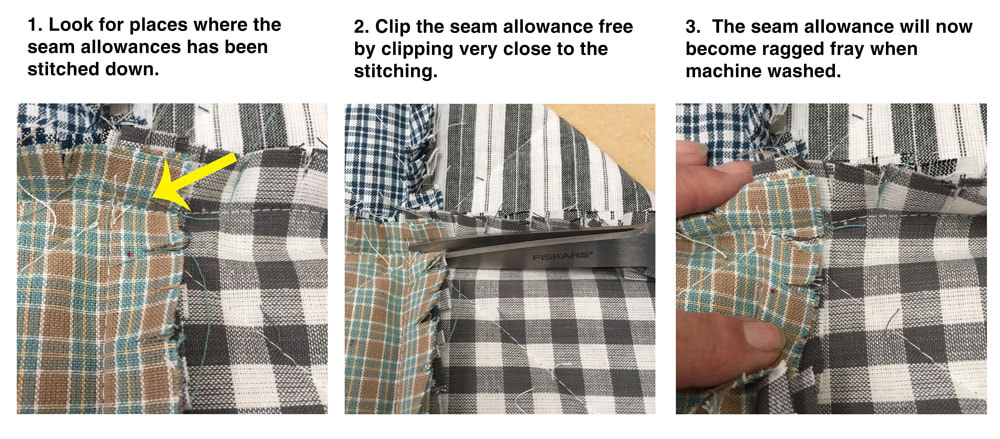
- If you haven't clipped the seam allowances yet, you will need to do that now. Even if you did pre-clip, you will now want to examine the quilt for places where the raw seam allowances got stitched down. Clip the seam allowance free at those points. See images below for example.
- Machine wash (cold) and tumble dry the throw using a liquid fabric softener if possible. The liquid fabric softener will help loosen the cut strings in the wash. A bit of table salt (about ¼ cup) added to the wash water will help set the colors of cotton fabrics and will help prevent fading and bleeding.
- You may want to wash this item alone because it will leave a lot of loose strings in your washing machine tub and in the dryer lint trap.
- Take the wet throw outside and shake it good to remove any loose strings before moving it to the dryer. You'll still have tons of lint and loose strings in the dryer. Clean the lint trap once or twice during the drying cycle.
- After washing and drying, remove any remaining loose strings using a lint roller. The finished quilt with have beautiful, fluffy frayed seams as in the image below. Enjoy!